Interfaz Dear ImGui
Empezamos descargando la librería https://github.com/ocornut/imgui.
Una vez descargada debemos descomprimir los ficheros .h y .cpp en nuestro proyecto, por ejemplo en src/libs/imgui.
Copiaremos también ese directorio los ficheros de backends llamados:
imgui_impl_sdl.himgui_impl_sdl.cppimgui_impl_sdlrenderer.himgui_impl_sdlrenderer.cpp
Debido a como he configurado el proyecto debo cambiar en imgui_impl_sdl.cpp y imgui_impl_sdlrenderer.cpp las referencias de #include <SDL.h> por #include <SDL2/SDL2.h>, también #include <SDL_syswm.h> por #include <SDL2/SDL_syswm.h>.
En el Makefile integraré los ficheros de esta biblioteca:
build:
    g++ -I src/include -L src/lib  -o bin/main *.cpp src/include/imgui/*.cpp -lmingw32 -lSDL2main -lSDL2 -lSDL2_ttf
run:
    ./bin/main.exe
clean:
    rm ./bin/main.exe
Es importante notar que esta biblioteca es buena para hacer debugging pero al compilarla tenemos que incluir el código en el ejecutable, lo que aumenta el tiempo de compilación y el tamaño resultante.
Una vez compile seguiremos el ejemplo oficial para integrarla con SDL2. Básicamente podemos añadir la inicialización en nuestra window.cpp:
#include "imgui.h"
#include "imgui_impl_sdl.h"
#include "imgui_impl_sdlrenderer.h"

#if !SDL_VERSION_ATLEAST(2, 0, 17)
#error This backend requires SDL 2.0.17+ because of SDL_RenderGeometry() function
#endif
Una vez cargado el renderer:
// Setup Dear ImGui context
IMGUI_CHECKVERSION();
ImGui::CreateContext();
ImGui::StyleColorsDark();
ImGui_ImplSDL2_InitForSDLRenderer(window, renderer);
ImGui_ImplSDLRenderer_Init(renderer);
Procesamos los eventos de ImGui justo en el bucle de eventos de SDL:
void Window::ProcessInput()
{
    fpsTimer.pause(); // Pausar para prevenir congelamiento
    while (SDL_PollEvent(&event))
    {
        ImGui_ImplSDL2_ProcessEvent(&event);
        switch (event.type)
        {
        case SDL_QUIT:
            running = false;
            break;
        case SDL_KEYDOWN:
            if (event.key.keysym.sym == SDLK_ESCAPE)
                running = false;
            break;
        }
    }
    fpsTimer.unpause(); // Continuar al recibir un evento
}
Durante el evento Update() podemos crear un ImGUI::NewFrame y crear una ventana donde por ahora podemos debugear la tasa de fotogramas mediante las funcionalidades de esta útil biblioteca gráfica:
void Window::Update()
{
    // Iniciar el temporizador de cap
    if (enableCap)
        capTimer.start();

    // Iniciamos un Frame de Imgui
    ImGui_ImplSDLRenderer_NewFrame();
    ImGui_ImplSDL2_NewFrame();
    ImGui::NewFrame();

    // Creamos ventana demo de ImGUI
    {
        ImGui::Begin("CPU 3D Rendering");
        ImGui::Separator();
        ImGui::Text(" %.3f ms/frame (%.1f FPS)", 1000.0f / ImGui::GetIO().Framerate, ImGui::GetIO().Framerate);
        ImGui::End();
    }

    // Old version
    avgFPS = countedFrames / (fpsTimer.getTicks() / 1000.f);
    ++countedFrames;

    // Custom objects update
    mesh.Update();
}
Ahora en Render() debemos renderizar la interfaz justo antes de las tareas de PostRender():
void Window::Render()
{
    // Renderizamos el frame de ImGui
    ImGui::Render();
    // Late rendering actions
    PostRender();
}
En las tareas de PostRender, justo antes de presentar el render SDL, haremos uso del backend renderer de ImGui para SDL:
void Window::PostRender()
{
    // Antes de presentar llamamos al SDL Renderer de ImGUI
    ImGui_ImplSDLRenderer_RenderDrawData(ImGui::GetDrawData());
    // Finalmente actualizar la pantalla
    SDL_RenderPresent(renderer);
}
Finalmente, durante el destructor, antes de liberar el renderer liberamos la memoria ocupada:
Window::~Window()
{
    // Liberamos ImGUI
    ImGui_ImplSDLRenderer_Shutdown();
    ImGui_ImplSDL2_Shutdown();
    ImGui::DestroyContext();

    // Liberamos SDL
    SDL_DestroyRenderer(renderer);
    SDL_DestroyWindow(window);
}
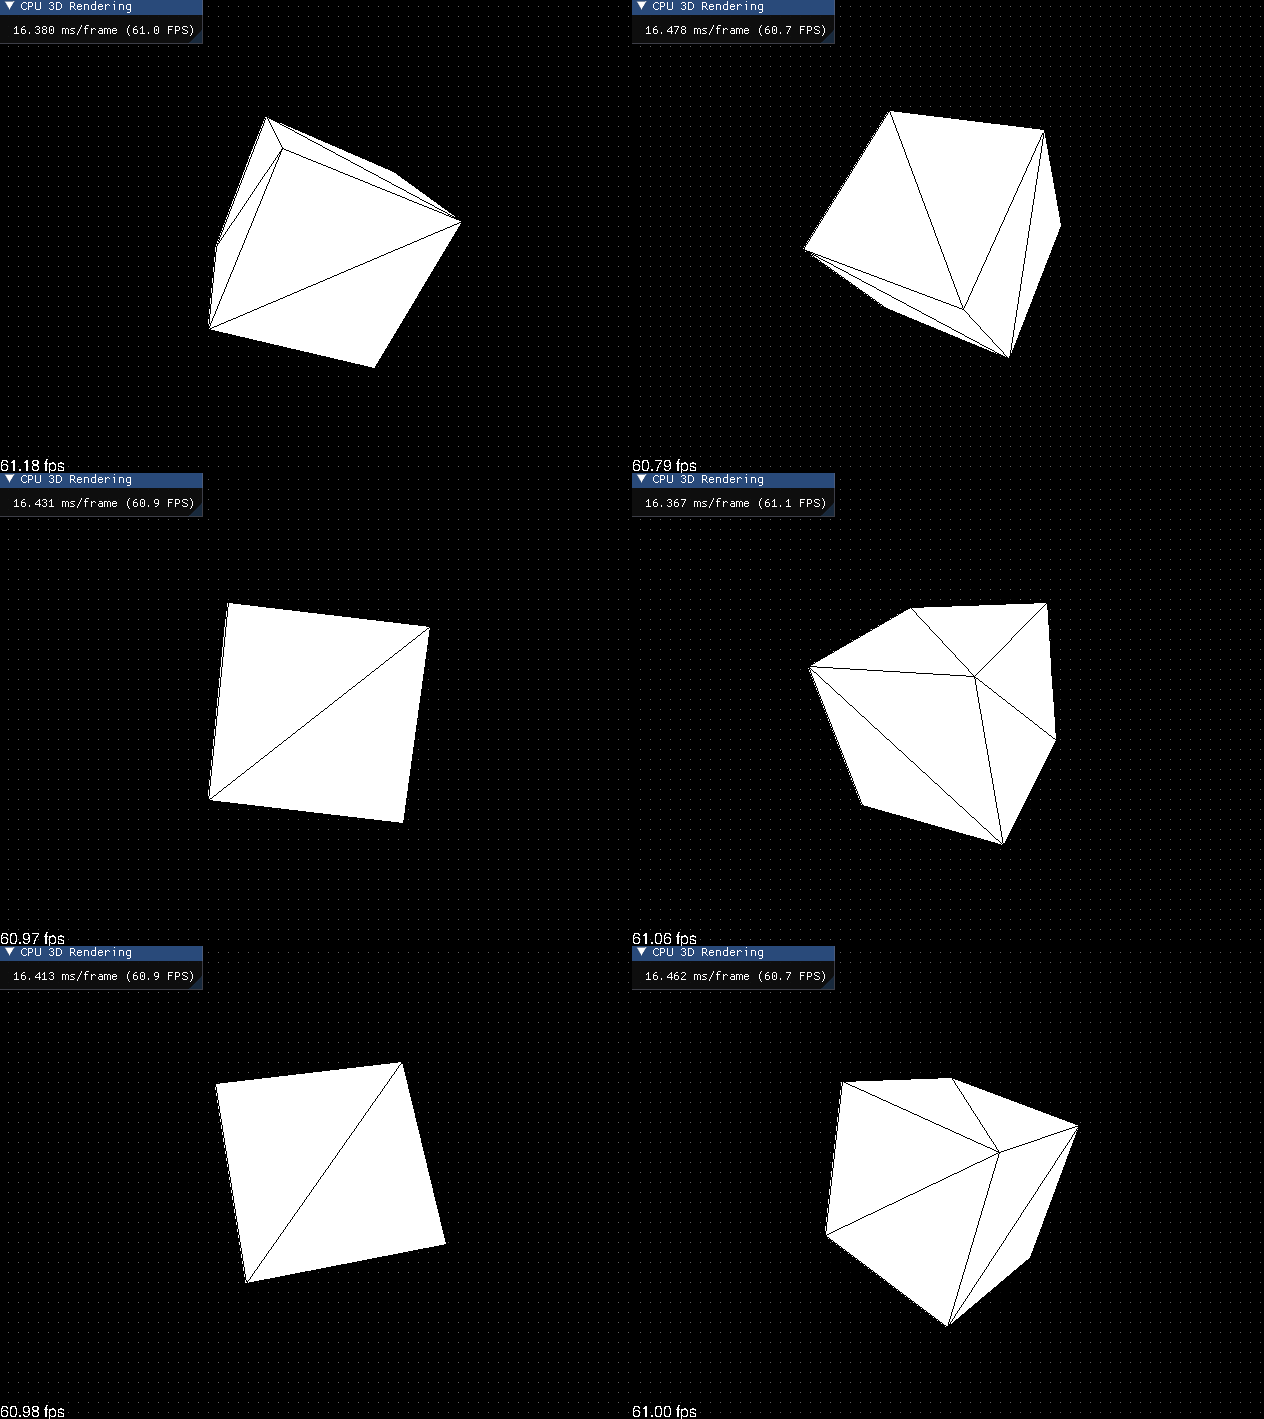
Si compilamos y ejecutamos el programa ahora:

En este punto creo que ya no necesitamos utilizar el módulo SDL TTF para dibujar el texto de los FPS, así que vamos a desactivarlo y a borrarlo de la compilación:
/* BORRAR TODAS ESTAS DEFINICIONES */

#include <SDL2/SDL_ttf.h>

SDL_Surface *textSurface;
SDL_Color textColor = {255, 255, 255};
TTF_Font *textFont;
float avgFPS = 0;
long countedFrames = 0;
Timer fpsTimer;

/* BORRAR TODAS ESTAS IMPLEMENTACIONES */

TTF_CloseFont(textFont);
TTF_Quit();

if (TTF_Init() < 0) {
    std::cout << "Error initializing SDL_ttf: " << TTF_GetError() << std::endl;
    running = false;
}

textFont = TTF_OpenFont("assets/FreeSans.ttf", 16);
if (!textFont) {
    std::cout << "Error loading font: " << TTF_GetError() << std::endl;
    running = false;
}

fpsTimer.start();
fpsTimer.pause();
fpsTimer.unpause();

avgFPS = countedFrames / (fpsTimer.getTicks() / 1000.f);
++countedFrames;

std::string avgFPSText = std::to_string(avgFPS).substr(0, std::to_string(avgFPS).size() - 4) + " fps";
textSurface = TTF_RenderText_Solid(textFont, avgFPSText.c_str(), textColor);
if (!textSurface) {
    std::cout << "Failed to render text: " << TTF_GetError() << std::endl;
}
SDL_Texture *textTexture = SDL_CreateTextureFromSurface(renderer, textSurface);
SDL_Rect dest = {2, windowHeight - 21, textSurface->w, textSurface->h};
SDL_RenderCopy(renderer, textTexture, NULL, &dest);
SDL_FreeSurface(textSurface);
SDL_DestroyTexture(textTexture);
Ya que estamos quitaré otras opciones que no estoy utilizando, como la de la pantalla completa:
bool isFullscreen = false;

if (isFullscreen)
{
    windowWidth = Window_mode.w;
    windowHeight = Window_mode.h;
}

if (isFullscreen)
{
    SDL_SetWindowFullscreen(window, SDL_WINDOW_FULLSCREEN);
}
Y quitaremos que incluya las definiciones de SDL TTF en el Makefile:
build:
    g++ -I src/include -L src/lib  -o bin/main *.cpp src/include/imgui/*.cpp -lmingw32 -lSDL2main -lSDL2
run:
    ./bin/main.exe
clean:
    rm ./bin/main.exe
Finalmente cambiaré el tamaño de la pantalla a 1280x720 para tener espacio donde juguetear con la ventana de la interfaz:
Window window(1280, 720);
Opciones de renderizado
Ahora que tenemos una interfaz para debugear vamos a añadir diferentes opciones a nuetro programa.
Empecemos con un par de opciones para desactivar el cap de FPS y cambiarlo con un slider:
ImGui::Begin("CPU 3D Rendering");
ImGui::Checkbox("Limitar FPS", &this->enableCap);
ImGui::SliderInt("Límite de FPS", &this->fpsCap, 5, 300);
Otra opción para dibujar o no la cuadrícula de fondo, aunque deberemos crear una variable booleana para controlar esa opción:
// Var
class Window
{
public:
    bool drawGrid = true;
}

// Render
if (this->drawGrid)
    DrawGrid(0xFF616161);

// Update
ImGui::Checkbox("Dibujar cuadrícula", &this->drawGrid);
Ahora unas cuantas opciones para manejar el renderizado de los triángulos:
- Dibujar vértices del modelo.
- Dibujar wireframe del modelo.
- Dibujar caras de los triángulos.
- Activar el back-face culling.
class Window
{
public:
    bool drawWireframe = true;
    bool drawWireframeDots = true;
    bool drawFilledTriangles = true;
    bool enableBackfaceCulling = true;
}
En la interfaz añadiremos las opciones:
ImGui::Checkbox("Dibujar cuadrícula", &this->drawGrid);
ImGui::Checkbox("Dibujar vértices", &this->drawWireframeDots);
ImGui::Checkbox("Dibujar wireframe", &this->drawWireframe);
ImGui::Checkbox("Rellenar triángulos", &this->drawFilledTriangles);
ImGui::Checkbox("Back-face culling", &this->enableBackfaceCulling);
Y las implementaremos en el renderizado de la malla:
void Mesh::Update()
{
    // Loop all triangle faces of the mesh
    for (size_t i = 0; i < triangles.size(); i++)
    {

        /*** Back Face Culling Algorithm ***/
        if (window->enableBackfaceCulling)
        {
            triangles[i].ApplyCulling(window->cameraPosition);
            // Bypass the projection if triangle is being culled

            if (triangles[i].culling)
                continue;
        }
    }
}

void Mesh::Render()
{
    // Loop projected triangles array and render them
    for (size_t i = 0; i < triangles.size(); i++)
    {
        // If culling is true and enabled globally bypass the current triangle
        if (window->enableBackfaceCulling && triangles[i].culling)
            continue;

        // Triángulos
        if (window->drawFilledTriangles)
        {
            window->DrawFilledTriangle(
                triangles[i].projectedVertices[0].x, triangles[i].projectedVertices[0].y,
                triangles[i].projectedVertices[1].x, triangles[i].projectedVertices[1].y,
                triangles[i].projectedVertices[2].x, triangles[i].projectedVertices[2].y,
                0xFFFFFFFF);
        }

        // Wireframe
        if (window->drawWireframe)
        {
            window->DrawTriangle(
                triangles[i].projectedVertices[0].x, triangles[i].projectedVertices[0].y,
                triangles[i].projectedVertices[1].x, triangles[i].projectedVertices[1].y,
                triangles[i].projectedVertices[2].x, triangles[i].projectedVertices[2].y,
                0xFF0095FF);
        }

        // Vértices
        if (window->drawWireframeDots)
        {
            window->DrawRect(triangles[i].projectedVertices[0].x - 1, triangles[i].projectedVertices[0].y - 2, 5, 5, 0xFFFF0000);
            window->DrawRect(triangles[i].projectedVertices[1].x - 1, triangles[i].projectedVertices[1].y - 2, 5, 5, 0xFFFF0000);
            window->DrawRect(triangles[i].projectedVertices[2].x - 1, triangles[i].projectedVertices[2].y - 2, 5, 5, 0xFFFF0000);
        }
    }
}
Para acabar unos sliders para controlar la posición y velocidad de rotación del modelo, así como la posición de la cámara y el fov factor. Estos los podemos gestionar con un SliderFloat3, aunque necesitaremos implementar una interfaz con un array de 3 flotantes para cada uno:
class Window
{
public:
    // Vector3 cameraPosition{0, 0, 0};   // <---- borrar
    float modelPosition[3] = {0, 0, -5};
    float modelRotationSpeed[3] = {0.01, 0.01, 0.01};
    float cameraPosition[3] = {0, 0, 0};
    int fovFactor = 400;
}
ImGui::Separator();
ImGui::Text("Posición del modelo (X,Y,Z)");
ImGui::SliderFloat2("Pos", modelPosition, -2,  2);  // mejor no tocar Z
ImGui::Text("Velocidad de rotación (X,Y,Z)");
ImGui::SliderFloat3("Rot", modelRotationSpeed, 0, 0.05f);
ImGui::Separator();
ImGui::Text("Campo de visión");
ImGui::SliderInt("Fov", &this->fovFactor, 75, 1000);
Deberemos adaptar el funcionamiento del mesh con los valores de estos arreglos:
void Window::Update()
{
    // Update Model Rotation Speed
    mesh.SetRotationAmount(
        modelRotationSpeed[0], modelRotationSpeed[1], modelRotationSpeed[2]);
}
En cuanto a la cámara, los métodos del mesh que la utilizan son TranslateVertex y ApplyCulling así que cambiémoslos para utilizar un arreglo en lugar de un vector:
void TranslateVertex(int vertexIndex, float *distance)
{
    vertices[vertexIndex].x -= distance[0];
    vertices[vertexIndex].y -= distance[1];
    vertices[vertexIndex].z -= distance[2];
}

void ApplyCulling(float *cameraPosition)
{
    // Find the vector betweenn a triangle point and camera origin
    Vector3 cameraRay = Vector3(cameraPosition[0], cameraPosition[1], cameraPosition[2]) - this->vertices[0];
}
Finalmente adaptamos la transformación de traslación en el mesh:
triangles[i].TranslateVertex(j, window->modelPosition);
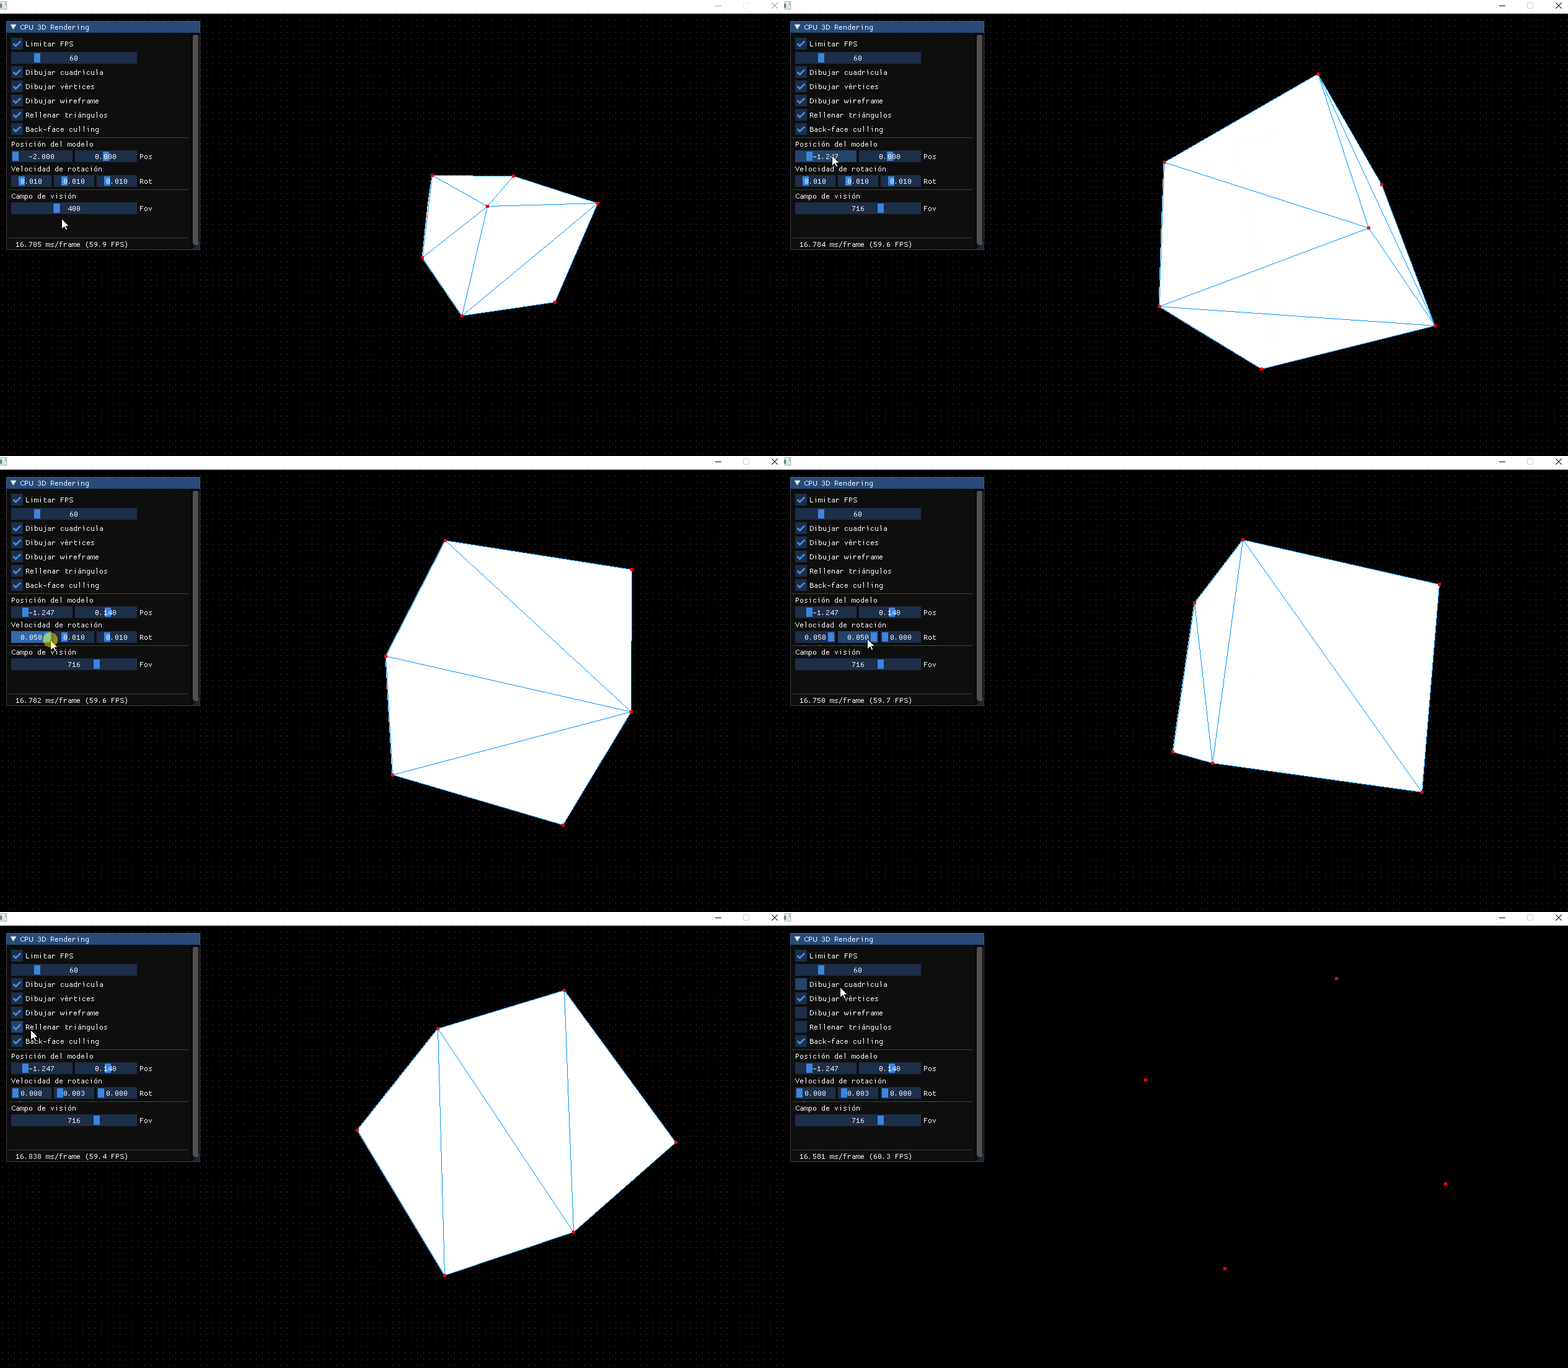
El resultado es genial y podemos manejar un montón de opciones en tiempo real:

Poco a poco iré añadiendo más opciones.
Última edición: 05 de Junio de 2022
